Painting a Still Life in Oils: Step by Step from Set-Up to Finished Picture
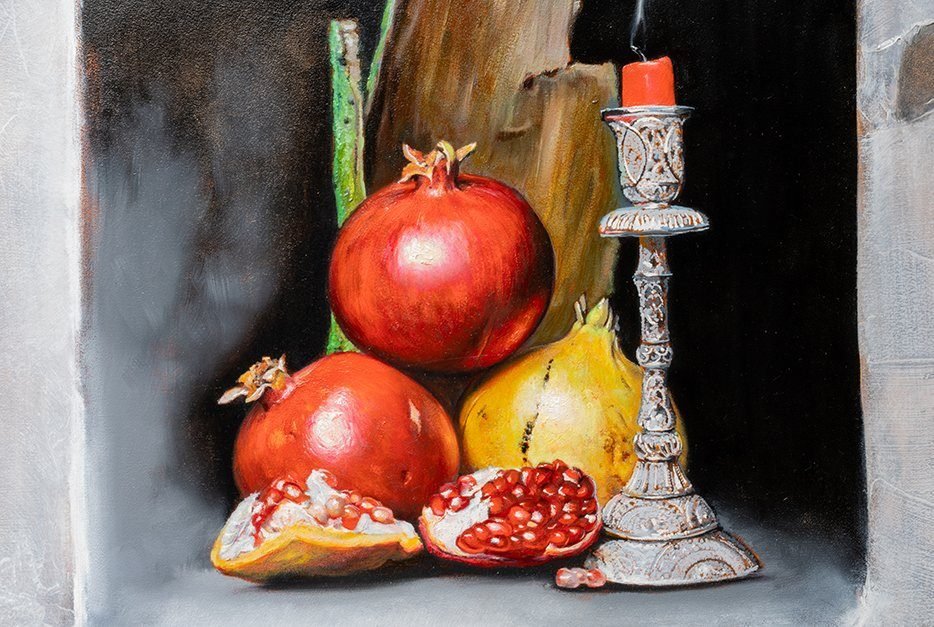
Painting a still life is the ideal way into oil painting: the objects don't move, the light stays the same, and you can calmly study form, colour, light and shadow. The path to a finished painting follows a clear sequence – set-up, drawing, underpainting, colour and details. These are exactly the steps I'll show you here.
There's a reason the still life has been part of painters' training for centuries. Everything you learn from it carries over to portraits and landscapes later.
Step 1: Setting up the still life
A good painting doesn't begin at the easel but on the table. Take your time with the set-up.
The right objects
- Start with three to five simple objects: an apple, a cup, a bottle, a cloth.
- Choose different shapes and sizes – something tall, something round, something flat.
- At first avoid highly reflective objects such as chrome, glass with many reflections and complicated patterns.
- Fruit and vegetables change over time. For paintings over several sessions, ceramics, wood or fabric are more reliable.
Composition
Arrange the objects so they partly overlap – this creates space. Avoid a row of equally sized objects side by side, and don't place the main object dead centre. A good rule of thumb is an odd number of elements and a roughly triangular grouping.
Make two or three small thumbnail sketches in pencil before deciding. You'll quickly see whether the distribution of light and dark works.
Light
Use a single light source from the side, such as a lamp or a window with even daylight. This creates clear light and shadow sides, form shadows and cast shadows. Several light sources make forms flat and confusing. I explain how to read light and shadow in detail in Drawing light and shadow correctly.
From life or from a photo?
You learn most by painting directly from the real set-up: your eye perceives colour nuances and space much better than on a screen. A photo is practical if you paint over weeks and can't leave the arrangement standing. Photograph it in exactly the light you paint it in and compare with the original whenever possible. For beginners: both are fine, but painting from the real object trains your eye the most.
Step 2: Tone the surface and lay in the drawing
Tone your surface with a thin, lean layer of ochre or burnt sienna. Such an imprimatura gives you a middle value from which you can judge light and dark more easily.
Once it's dry, lay in the drawing – with charcoal, pencil or a small brush and thinned umber. Pay attention to the big relationships first: how tall is the bottle compared with the cup? Where do the objects sit on the table? Details such as patterns or labels come much later.
- Measure proportions and angles with your brush at arm's length.
- Draw ellipses (cup rims, bottle bases) symmetrically and rather too flat than too round.
- Mark the shapes of the cast shadows as well.
Step 3: The underpainting
In the underpainting you establish the distribution of light and dark without worrying about colour. Mix, for example, burnt umber with a little ultramarine and thin it with odourless solvent. Paint shadows and dark areas thinly; leave the lights free or wipe them out with a rag.
Squint while you work: details disappear and you see only the large value shapes. If the underpainting works as a black-and-white image, the colour painting will work too.
The underpainting stays lean. This sets up fat over lean: the following layers contain progressively more oil. Ventilate well when working with solvent.
Step 4: Building colour
Now comes colour – in this order:
- Darkest areas and shadows first, fairly thin.
- Mid-tones in larger areas, a bit thicker.
- Light sides with more paint, opaquely.
- Background and table surface developed alongside, not at the end – they determine how the objects' colours read.
Work on the whole painting at once instead of finishing one object. Watch colour temperature: under warm lamplight shadows are often cooler; under cool daylight they tend to be warmer. Shadows are almost never simply black. And don't forget reflected light: a red apple casts a reddish glow onto the white cup next to it.
To push depth and luminosity further, you can glaze individual areas once dry. Read how in Glazing in oil painting.
Step 5: Details, edges and highlights
Details come right at the end – and sparingly:
- Edges: not every edge is sharp. Keep edges in the light and in focus crisp; let others in shadow and background soften.
- Highlights: place them last with thick, barely thinned paint and a few confident strokes. Pure white is rarely needed – a hint of the light's colour makes it livelier.
- Textures: only suggest wood grain or fabric. The eye fills in the rest.
Step back regularly and look at the painting from a distance or in a mirror. You'll spot errors in proportion and value immediately.
Frequently asked questions
How long does a still life in oils take?
A small still life painted alla prima in one session is doable in a few hours. With imprimatura, underpainting and several colour layers you work over multiple sessions, because layers need to dry in between.
What size is best for a first still life?
A small to medium format, roughly between 24 × 30 cm and 30 × 40 cm. Paint the objects at about life size or slightly smaller.
Which colours do I need?
A limited palette is enough: titanium white, yellow ochre, burnt sienna, a yellow, a red, ultramarine and perhaps burnt umber. You can mix almost every tone of a still life with these.
Can I learn still life painting online?
I cover the basics in my Udemy course Entdecke die Welt der Ölmalerei (in German).
Conclusion: the still life is the best school
Painting a still life teaches you everything good painting is made of: composition, drawing, values, colour temperature and handling edges. Go step by step, start simple and take your time. If you'd like personal guidance and feedback directly on your painting, you'll find my current painting courses and workshops under Courses and dates.
Gallery